
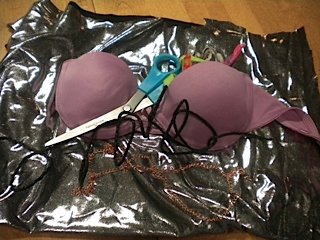
The staples for this DIY:
- Old strapless bra
- Some fabric (I used some leftover shiny swimsuit fabric that I made a toga out of for a toga party, but you could use old T-shirts or jeans. My friends and I were called Greek goddesses. It’s no big deal.)
- Other fabric scraps, lace, cording and/or chains (This can be used to make one of the straps a bit different but it isn’t necessary.)
- Fabric shears
- Fabric glue and/or needle and thread

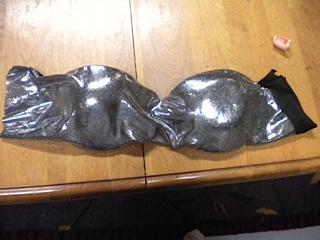
Once I cut out the basic shape of the fabric, I laid it over the bra and folded the excess edges over the inside of the bra. I then used fabric glue to adhere these edges to the inside of the bra, and I placed a bit of glue under the fabric on the top of the bra as well. I am a bit of a worry wart, so I did a quick whip stitch on the top and bottom edges of the bra to make sure my bandeau wouldn’t fall apart during my summer adventures.

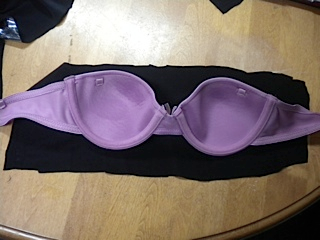

Next, I cut the band of the bra so that there was about 1 to 1 ½ inches left on each side of the bra. I wrapped the edges of the fabric over my band stubs, trimming where necessary, and glued and stitched them down.

Set your bra to the side to let the glue dry a bit and pick up your fabric and other fabric scrap items. Cut seven long strips of your fabric and put one to the side. I cut mine about 1 ½ feet long, but the goal is that the strips are longer than what takes to get around your back so that it fits even when the braiding process shortens it. My strips were about 1-inch in width, which will make a nice size braid. The other six can be divided into two groups of three. Take each group and knot the top and then braid, measuring it around your back to see how long it will need to be to connect the two ends of your bra. Knot the ends of both when you are finished braiding. Braiding is so relaxing that you might need to wake yourself up from your peaceful trance.
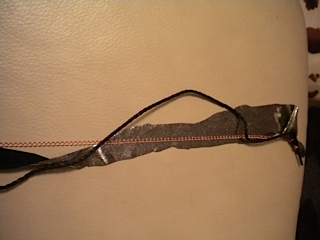
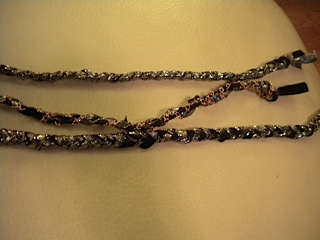
For the third braid, I spiced it up a bit and braided one strip of the fabric with some black leather cord and a chain. It was tricky tying the ends but with a can-do attitude you can succeed! (I find that I get unnecessarily cheesy with the encouragement when it comes to crafting).

The instructions that I found on Pinterest told me to just attach velcro to the band stubs of the bra and the ends of the straps and call it a day but I wasn’t into that because I didn’t want to put all my trust in fabric glue for the velcro because it would’ve been too hard to sew it onto the straps. I sewed the straps down to the band stubs on the bra and trimmed off the knots. I then “tried on” the bandeau by wrapping the straps around my back and finding out where I should sew them on the other side. If you already have read any of my DIY columns, my favorite broken record goes by the tune of “it’s a lot of guess and check,” which is quite applicable for this process. I had to cut some of my stitches to make my straps tighter, which almost drove me insane, which can be dangerous when you have a needle in your hand.
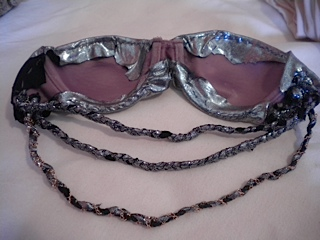
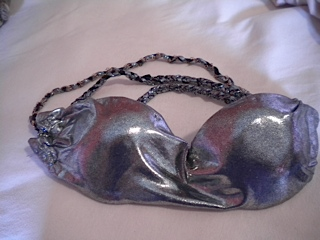
After tiring my fingers thoroughly and creating welts from pulling the needle so hard, a final fitting shows that all my work is not in vain! Bam! You now have a bandeau that is one of a kind. For more instructions, check out the ones I followed in this link. I combined the instructions for the three-strap bandeau with the fabric covering of the jean bandeau that is a bit down the page. Now pull out some backless and back cut-out shirts and dresses to show off your handiwork!
This tutorial is part of Veronica DeStefano's weekly DIY column, inspired by projects found online.
By: Veronica DeStefano | Images: Veronica DeStefano | Instructions: Source
By: Veronica DeStefano | Images: Veronica DeStefano | Instructions: Source


You get all informations about Veterans Day 2016 here.
ReplyDelete