Showing posts with label MIZ-DIY. Show all posts

Chipper Earrings: Paint Chip DIY


As a child, I loved going to Home Depot just to gaze lovingly at the wall of paint chips. My mom would always let me pick out a couple to take home (the common theme seemed to be bright pink, go figure) and I would put them in my scrapbook. When I was in sixth grade, I got the opportunity to pick two colors for my room in the new house we were building, and I was ecstatic to go through all the lovely paint chips for a purpose. So when Pinterest showed me a DIY using paint chips to create earrings, my trip down memory lane made it a must do!

Chips off the old block that you need:

  • Paint chips (Pick the ones that have multiple gradients of a color. I grabbed a whole bunch of the Behr ones, and the Home Depot may or may not have questioned my morals.)
  • Earring hooks, jump rings (I have some of this stuff leftover from when I made duct tape earrings.)
  • Circle hole punch (I used one that is 1 ⅜ inches in diameter.)
  • Little hole punch (or some sort of needle thing to punch a tiny hole for the paint chips to connect to the earring hooks)
  • Glue (a glue stick, adhesive tape runner, tacky glue or whatever)
  • Scissors
  • Pliers

The first thing you will do is punch circles in each color on the gradient. Make two sets of these circles so that you will have a set per earring. I found it easier to cut off the area with the names to get to the plain color area with my hole punch. Pro tip for using hole punches: Flip it over so that you can see the paper through the opening of the punch. This helps you make sure you are punching where you want to.


Now you have to make the big decision of what you want to make your base, either the lightest or the darkest color. To get the classic ombré effect, make the lightest color the base so that the smallest part of the circle will end up being a piece of the darkest color and it goes down to the lightest.

The base color will stay uncut in its circle form. Take the next color in the gradient (a color a shade darker for me), and carefully slide it into the circle hole punch. Have a part of the circle punch area open and not covered by the paper. It should kind of look like the opening is a crescent moon, and the paper is the shadow covering the rest of the moon (or the paper is a gibbous moon, but only people who took astronomy would understand that). Punch that out so that you have a crescent shape and thick almond shape. You will be using the almond shape layered on top of the base. To create the corresponding color almond for the other earring, follow the same punching technique or use the first almond shape as a template to cut the other one out.


Now you move onto the next darkest color, and you follow that same punching technique, except this time you want the empty space crescent to be thicker so that the almond shape is smaller. Repeat for the second circle of that darker color. You now have your darkest circle, and you want to create the smallest almond shape for that so the empty space in the hole punch must be the largest.


Once you have all your little pieces cut out, you can start layering by placing the biggest almond piece on the base piece by lining up the cut edge to the top edge of the base circle. Put glue of some sort on the back of that piece, and place it down on the base.


If you don’t believe in the strength of your hole punch, punch holes in the same place on each of the four pieces for the earring before you glue so when it is all glued together you can attach an earring hook. To get the most accurate punching, punch the first piece, line up the next piece under it, and punch through the hole you already made. You also can use a heavy duty punch and wait until the end to punch through all the glued pieces.

Now back to the layering business. Once you have glued down the biggest almond piece, take the next smallest piece and line the cut edge up to the top edge of the base circle, and glue it there. Repeat that for the smallest piece, and do the same steps for the second earring. 


Wait for the pieces to dry a bit before you punch the little hole through the top. Once you have punched the hole, you have the option of using two jump rings to attach the ombré circle to the earring hook or to just open up the loop at the bottom of the earring hook with your pliers. I chose the latter because it will have the circle face the right way without the added annoyance of opening and closing two jump rings. Use the pliers to close the loop back up. 


Voila! You now have a set of über trendy (and über inexpensive) earrings! Grab a whole bunch of colors and make lots for you, your mom, your aunt, your grandma, your friends and even your enemies because it’s that easy. You can always switch this up by using multiple different colors in the earring or using a different shape punch. You can use Mod Podge (my best friend) to be the adhesive and sealant if you worry about the staying power of your earrings. Chip it up!

By: Veronica DeStefano | Instructions: Source

Decorating Diva: 6 DIY Decor Ideas


We are well into the school year, and fall fever has begun to cast its spell. Between ordering this semester’s books and stocking up on #2 pencils, I almost forgot about one of the main priorities on my collegiate checklist: finalizing my living arrangements. Although I am staying on campus alongside three suitemates, I didn’t have the slightest clue on how to decorate my dorm. Luckily, with the help of several pinned DIY ideas, Pinterest has become my go-to guide on enhancing my home away from home. Don’t leave yours bare; have fun personalizing your space with six tricks of the trade.


What you’ll need:
  • Wiffle balls
  • Faux flowers
  • Hot glue gun
  • Ribbon

How you’ll do it:
  • Pluck any stems off of a single flower, making sure not to pull apart the flower itself.
  • Hot glue a circle around an opening in the wiffle ball.
  • Press the flower onto the hole until glue hardens.
  • Keep going until the ball is full of flowers, but make sure to leave room to tie a ribbon onto the ball.
  • Hang it up and enjoy.


What you’ll need:
  • Elmer’s glue
  • Pencil
  • White canvas
  • Watercolor paint
  • Paintbrush

How you’ll do it:
  • Sketch out a design of your choosing on the white canvas.
  • Use the glue to trace your design.
  • Let glue dry completely.
  • Paint over your design and the canvas until satisfied.
  • Hang it up and enjoy.


What you’ll need:
  • Mirror with hanging hooks
  • Wide ribbon
  • Chalkboard spray paint
  • Chalk
  • Newspaper

How you’ll do it:
  • Lay down newspaper in a well-vented area, and position mirror.
  • Refer to the directions on the can of spray paint to ensure an even coat.
  • Let dry.
  • Test out the paint job with the chalk.
  • Tie ribbon onto the mirror’s back hooks.
  • Hang it up and enjoy.


What you’ll need:
  • Pre-made wooden plaque
  • Wood stain (optional)
  • Tiny nails
  • Embroidery floss
  • Ruler
  • Scissors

How you’ll do it:
  • Use wood stain to finish the pre-made wooden plaque. Let dry completely.
  • Place nails two-and-a-half centimeters apart, and nail down a pattern, initial or shape of your choosing. TIP: When placing nails, use your judgement, and make sure not to nail them down too close together because the wood could split.
  • Wrap embroidery floss around the nails in a diagonal and/or criss-cross fashion until satisfied.
  • To finish, tie the ends of the floss around a nail.
  • Hang it up and enjoy.


What you’ll need:
  • Styrofoam
  • Glue
  • Quilt batting
  • Pencil
  • Pins
  • 2 fabric patterns
  • Ribbon
  • Scissors

How you’ll do it:
  • Draw your letter on a piece of styrofoam.
  • Apply glue on one side of styrofoam surface.
  • Glue some quilt batting in the shape of your letter onto the styrofoam.
  • Cut out your letter twice, using each fabric pattern once. TIP: Make sure to leave at least an extra half-inch of fabric on all sides when cutting out your letter.
  • Start wrapping the letter by pinning the fabric on the sides.
  • When one side is done, do steps 1-4 again on the other side using a different fabric pattern.
  • Cover the edges with a ribbon to hide imperfections.


What you’ll need:
  • Patterned pillowcase
  • Embroidery hoop
  • Ribbon
  • Scissors

How you’ll do it:
  • Place the top of a pillowcase in an embroidery hoop.
  • Attach a ribbon to the hoop’s fastener for hanging.
  • Hang it up and enjoy.
  • TIP: Not only can this bag be used for laundry, it’s also a great catch-all for anything you can come up with!

*Before hanging, make sure to ask if your specific dormitory or apartment complex allows for any nailing or taping to avoid damage or those pesky fees.

By: Brianna Arps

Painted Shoes DIY


Do you have an old pair of white shoes laying around like me? Or do you want to spice up your shoe collection? Bright and fun Keds are all the rage now. Taylor Swift even has her own line of patterned Keds. I found this great DIY in the August issue of Redbook Magazine, and I knew that I had to try it on my pair of white shoes.


I was cleaning my room a couple weeks ago and found these white shoes in my shoe rack. They look like Keds, but they are the knock-off Target brand. I decided that it was time to revive them and find a way to wear them today. When I found this DIY in Redbook, the bright, fun colors really stood out to me. Plus, I had all the materials in my house, so I knew I had to try it. The directions were so easy to follow, and I think the shoes turned out great. The magazine even gave a link for a more detailed tutorial, which you can find here.

What You Need:

  • 1 Pair of white shoes
  • 3-5 acrylic paints
  • Scissors
  • Painters tape
  • Small paint brush


First, cover the surface you are working on with newspaper and gather your supplies. Then you need to remove the laces and cover the tongue and the outsole of the shoe with tape. This will keep these areas white. Next, take ¼-inch painter's tape. I only had 1 in. thick masking tape, but cut it in fourths to make it the right size. Start making boxes on the shoes. The magazine suggests that you vary the size and width of the boxes. As I tried it, I realized that there really was no rhyme or rhythm to the pattem. I started out trying to follow the picture, but all the sides are not shown. Instead, you can be creative and place the strips of tape all around the shoe. Once you have completed this step, your shoes should look like this:


My tape did not really stick all that well, but that did not matter. The important thing is to use a small, hard paint brush and not a lot of paint. I would also suggest using your fingers to press down the tape before you paint a square to ensure that the colors don’t mix. Start with your first color and only use a small amount of paint. Paint the entire square, and do not be afraid to paint the tape.


This is what my shoes looked like when I was done painting. The only hard part about painting was the lace holes. My painting was also not exactly accurate, but once I took the tape off, you could not tell. I really love how my shoes turned out. They are such a great addition to my wardrobe. While the shoes are not the most durable, and I do not think they will last through the fall, they are a great for right now. You could wear them with a nice pair of boyfriend jeans and a T-shirt for a day look.


I can’t wait to wear these this fall! Have you ever done a DIY with your shoes? Let us know!

By: Abby Kass

6 Recipes for a DIY Spa Night


A trip to the spa is usually characterized by the nestling of one’s worries in plush face pillows and the tapping into of an inner zen. Although it may scream relaxation to the tee, if you’re like me and footing the bill at the end of a session results in sweaty palms, call up the gals and prepare to pamper your pockets because six quick and easy recipes will teach you the ways of a “kitchen beautician.”

1. Decorated Glycerin Soap


Cute suds for some fun in the tub.

What you’ll need:

  • Clear glycerin soap
  • Food coloring
  • Coffee stirrers
  • Clean milk or juice carton (yogurt cups work great, too)
  • Petroleum jelly
  • Faux flowers
  • Scissors 
  • Bench scraper

How you’ll do it:

  • Heat glycerin in a microwave on high, stirring at 15-second intervals, until it’s completely melted.
  • Mix liquid food coloring into bowl with a coffee stirrer. Tip: Use food coloring sparingly.
  • Coat the inside of a container with petroleum jelly. Pour in melted glycerin. Add a few faux flowers and let cool completely for about two hours.
  • Cut or tear away container and slice block into individual bars with a bench scraper. 

2. Bath Fizzies


Spice up your daily cleansing routine by adding a dash of color and excitement.

What you’ll need:

  • ½ cup citric acid
  • 1 cup baking soda
  • ¾ cup cornstarch
  • ¼ cup organic cane sugar
  • About 6 drops of food coloring
  • 10 to 15 drops of an essential oil
  • 2-ounce travel size spray bottle, plastic pipette, silicone ice-cube tray and storage jars
  • Glass measuring cup, metal spoon, flour sifter and mixing bowl
How you’ll do it:

  • Stir together citric acid, baking soda and cornstarch in a glass measuring cup.
  • Pass mixture through a fine flour sifter into a mixing bowl. Stir in sugar.
  • Fill spray bottle with water and add food coloring. Spritz mixture lightly until you can pack it with your hands.
  • Using pipette, add oil (one drop at a time) until strength of scent is to your liking. Using a metal spoon or your hands, mix ingredients until color is even throughout. Tip: When mixture begins to dry out, spritz until packable again.
  • Spoon into ice-cube tray, pressing firmly. Let dry at room temperature overnight. Pop out of tray gently. Transfer to jars. 

3. Honey Coconut Hair Milk Smoothie


Skip the lime and add the coconut for nourished, supple tresses.

What you’ll need:

  • ½ can of pure, unsweetened coconut milk
  • 1 ripe avocado
  • 2 tbsp olive oil
  • 2 tbsp pure honey
  • Blender
  • Spoon
  • Shower cap

How you’ll do it:

  • Combine ingredients in a blender and mix until they reach a smoothie-like consistency.
  • Part your hair into four sections and generously apply the mixture from root to tip, concentrating on the ends of your hair. 
  • Place a shower cap on your head and leave it on for twenty minutes.
  • Rinse hair under room temperature water until smoothie is completely dissolved. 

4. Sugar Lip Scrub

Pucker up with a treatment that leaves lips irresistibly soft.

What you’ll need:

  • 1 tsp brown sugar
  • 1 tsp honey
  • 1 tsp essential oil

How you’ll do it:

  • Mix the brown sugar and honey together to create a paste and thickly coat your lips.
  • Leave it on for a few minutes and then start to gently scrub with your finger until all the dead skin has been buffed off.
  • Immediately dab on essential oil to moisturize.

5. Cooling Cucumber Toner


A simple concoction that rids the skin of excess oil by clearing pores and leaving your face feeling both refreshed and soothed.

What you’ll need:

  • ½ cucumber with peel, chopped
  • 3 tbsp witch hazel
  • 2 tbsp distilled water
  • 2-ounce travel size spray bottle
  • Blender or food processor
  • Flour sifter


How you’ll do it:

  • Put all of the ingredients in a blender or food processor and blend until smooth.
  • Pour the mixture through a fine flour sifter to remove all of the solids, then pour the toner into a clean spray bottle with a tight-fitting lid.
  • To use, apply using a clean cotton ball.

6. Chocolate Mud Mask


Brighten your complexion while indulging in the sweet, yet distinctive combination of cocoa and coffee.

What you’ll need:

  • 4 tbsp finely ground espresso or coffee beans
  • 4 tbsp unsweetened cocoa powder
  • 8 tbsp almond milk
  • 2 tbsp honey
  • Bowl, stirring utensil and washcloth

How you’ll do it:

  • Mix coffee and cocoa powder in a bowl.
  • Add the almond milk and stir until a smooth paste forms. Tip: Use less almond milk if you like a thicker paste.
  • Stir in the honey. Tip: Honey may be warmed in the microwave to allow for better mixing.
  • Apply the paste to your clean face and neck.
  • Let the mask dry.
  • Wet a washcloth and press it to your face to loosen the mask, then rinse with warm water. 

For more tasty facials and the guides to whipping up an array of beauty bar favs, visit http://laurenconrad.com and www.marthastewart.com!

By: Brianna Arps

DIY Workout Tank


For several years now, I have been using my summer break to try and get in great shape. That seems pretty typical because lots of people want to get that coveted bikini bod. Whether I use a Seventeen magazine workout plan (those are surprisingly effective), home workout video, go to the health club or just run and bike on the forest preserve trail next to my house, I try anything to stay active and fit. After completing my first year of college that ended with a lot of stress, late night eating, not enough working out and a little extra weight, I knew that this summer was mine to get my butt in gear.

Sometimes the motivation doesn’t always come easily, but nothing motivates me more than cute workout clothes. I fawn over the fashion of Nike and lululemon, but sometimes you can create an adorable look without breaking the bank! Yay craftiness for the ability to make cute workout tanks!

Pre-workout necessities:

  • A T-shirt (We all have that stack of free shirts that we only wear to workout anyways. I am using an old shirt from Jones Hall that I got to get me pumped about being an RA there!)
  • Fabric shears (If you have been following my DIYs, you should know the difference between scissors and fabric shears and you probably have already invested in a pair. They will make your college crafting and T-shirt cutting life much easier.)
  • Yes, that is all you need. Super easy, folks. 

Start by cutting off the crew neck collar of the shirt. To avoid cutting way deep into the back due to cutting around the front part of the collar, don’t cut through both layers at once. Snip next to the collar to get started and then cut through one side and go around to the other. This isn’t that terribly important for this DIY because we will be cutting into the back anyways, but it is a good habit to form.


Now it’s time to turn this tee into a tank! Cut off one sleeve, sort of following the shape of the armpit seam. You get to choose how thick or thin you want the straps of your tank top to be depending on how close or far from the neck hole you cut the sleeves off. After cutting the first sleeve, fold the shirt in half (hot dog style, if you go by preschool folding styles) to use the cut part as a template for cutting off the other sleeve. 


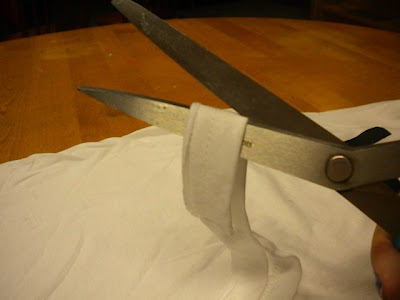
After the transformation from T-shirt to tank top is complete, cut off the hem of the shirt. Make sure the bottom of the shirt is lined up so that you aren’t cutting into the hem on one side. You will now have a little hem hoop. Cut the hoop so that it becomes one long strand. You can then cut the excess fabric on the other side of the hem. Gently stretch the hem strand by holding the two ends in either hand and pulling. Let that hang out on the side until we are ready for it. 


Flip your shirt over to get to work on creating a sporty racerback. Use a pencil or your intuition to trace and cut deeper into one side of the back to create a racerback. DO NOT CUT THROUGH BOTH SIDES. The key word in racerback is “back.” Just cut the back. Got it? Good. (Glossers, I am ashamed to say that I accidentally cut through the front of my Jones T-shirt, so I cried a bit and sang Hannah Montana’s “Nobody’s Perfect” and grabbed my white Blackhawks Stanley Cup Champions shirt. Don’t judge me too hard.) Use the piece you cut from the one side to be the template to cut the other side.


After you wipe that nervous sweat from your brow from cutting that racerback, cut a deep “V” shape (For Veronica! Oops, sorry that is my natural reaction because I guess I am a kindergartener.) into the back of the shirt from the top. 


Remember our friend, the hem strand? It’s time to bring him back into the game. Thread the strand through the straps of the tank top in the back and tie a double knot near the top of the “V” and then wrap it down the straps, around where the “V” is. Make sure you are pulling kind of tight when you wrap the strand down the straps. Once you are done wrapping, tie a double knot at the end of the wrap. Cut the excess ends of the strand.


Now it’s time to make neck and hemline decisions! You can cut a deeper scoop neck into the front of the shirt or leave it as is. I am, obviously, a v-neck fan but I am not doing that on my shirt today. For the hemline, you can leave it as it, make it cropped, make it high low or make it like a baseball shirt, high cut on the sides. I decided to do the baseball cut, so I folded my shirt in half and cut a curved line, starting high on the side and ending low at the fold.

Once you have done all the hemline and neckline cutting that your heart desires, you are done! You can try on the tank top to see if you need to adjust any cuts or stretch the top to create skinnier straps and make the cotton jersey taut. You can modify this DIY by tie-dying your shirt before you cut it. Now you can throw it on over your sports bra and get to working out! You’ve got this, Glossers!

By: Veronica DeStefano | Images: Veronica DeStefano | Instructions: Source

Heart Printed Cut-offs DIY

Don’t wear your heart on your sleeve, wear it on your leg!"
As you Glossers probably know, printed and patterned shorts are a hot item this summer. But as poor college students, sometimes dropping the dough on shorts isn’t exactly in our summer job budget. This is why you read my column, friends. Some adorable shorts could be yours for the low price of some fabric paint and maybe thrifted jeans if you don’t have old jeans or shorts to use.

Your lovely materials:

  • Old jeans/shorts (Go through your closet, your mom’s closet or your local Goodwill!)
  • Fabric paint (I got Tulip Soft fabric paint in Velveteen White.)
  • Sponge brushes (You know I have those for all my Mod Podge needs.)
  • Cardboard or really thick cardstock
  • Heart hole punch or the ability to draw a heart that you are content with

The DIY I was inspired by used long jeans but, with it being summer and all, I took the liberty to hack some jeans into shorts. For those who aren’t experienced at this craft, use a ruler or tape measure to figure out how long you want the in seam and then mark and cut them at that measurement. Always start with a bit longer of a inseam than you think you want and try them on to figure out if you need to cut more. But,feel free to keep them as full on jeans if you want them to be for the fall and winter and those other cold weather times.


Now that I gave you a CliffNotes version of cutting up your jeans, lets get on to the actual pattern part. For making the heart template, you can use the preschool method of folding your cardboard or cardstock in half: draw half of a heart and cut it out, so when you unfold it looks like a whole heart. Or you can be completely lazy and use a heart hole punch. I punched two hearts about 1 ½ inches apart. How much space you want between hearts is up to you, though. Punching the two hearts makes it easier to keep the hearts in line and equally spaced, otherwise you can get really intense and use a ruler to mark out spots where you will paint hearts. But it is summer, and the livin’ should be easy ... am I right?


Once you have assessed your laziness in making hearts, it’s time to get on to the fun part: painting! The key to this is holding the stencil flat to the jeans and using the itsy, bitsy, tiniest amount of paint on your brush as possible to avoid smudging hearts into oblivion. If there are some smudging problems, use a wet dishcloth with some dish soap to quickly wipe up the heart or quickly use the edge of your nail to straighten it out. 


Go on painting a row with your template, making sure there is equal spacing between each stencil duo of hearts. When you go on to the next row, stagger that stuff so that the the pattern doesn’t have too much empty space and generally looks good.


Continue doing this pattern until the front is finished. Let the front dry and continue onto the back. It is really up to you how you attack how much you paint. You can just do one side, half of a side, just the back pockets or whatever! Creative freedom at its finest! Try different punches, like circles or stars, for a different look!

There you go, you have the ability to punch holes and paint! This is one of the easiest and most rewarding DIYs you can do! So, slip on those shorts (make sure they are dry and make sure you let them dry for a day or so before washing -- read that paint bottle) and be prepared for the onslaught of compliments!

By: Veronica DeStefano | Images: Veronica DeStefano | Instructions: Source

Bangle Pops: Popsicle Stick DIY


It is taking every fiber in my being not to just watch more videos of the Blackhawks game and just run around screaming about the Stanley Cup win (I am writing this the day after the win, for you future readers). I was extremely tempted to just give you glossers a “How to Celebrate the Hawks Winning the Stanley Cup” DIY, which I wrote out right here:

Materials: iPod or YouTube cued to “Chelsea Dagger” by The Fratellis

Step one: Cry because you are so happy.
Step two: Smile everywhere you go because you are so happy.
Step three: Like, favorite, share and retweet anything Blackhawks related on social media.
Step four: Cry into the Stanley Cup champions shirt you already got (thanks to your brother running out to Sports Authority at 10:30 at night).
Step five: Watch that last minute or so over and over again until you can't cry anymore.
Step six: Swoon over Kane, Toews, Shaw, Crawford, Keith, Coach Q's mustache and their adorable wives and children.
Step seven: Wait for the parade because WHY ISN'T IT FRIDAY YET?

But, I know you Glossers don’t read my column to see how I fangirl over the champion hockey team. So, never fear, I did indeed do a DIY of the crafty sort.

The glorious season of summer means many things: no school (unless you are doing summer classes, in which I pray for your soul), cute swimsuits, the hot sun and the cold treats that follow. Honestly, I am not much of a Popsicle girl because I am more of a Fudgesicle girl or a Dove bar lover (read: chocolate goodness on sticks). Popsicle sticks are so quintessentially summer that I couldn’t help myself when I stumbled upon the the instructions for making bangle bracelets out of them.

Run after the ice cream truck and grab:

  • Popsicle sticks (Or tongue depressors. You want the ones that are wider. They even have cool, wavy ones at some places.) 
  • Patterned paper (to cover the sticks with)
  • Pencil and scissors (for tracing and cutting the paper)
  • Mod Podge
  • Sandpaper
  • Cups and deep baking dish (The dish is for soaking the sticks, and the cups are for forming the bangle shape.)


You want to first start by picking out some cute patterned paper that you want to cover your popsicle stick bangle. As someone who was an avid scrapbooker, this is not a problem for me (ALL OF THE CUTE PATTERNED PAPER). Flip the paper over so that the patterned side is down and use the pencil to trace around Popsicle stick. The instructions I found on Pinterest said that the wood will expand a bit so I traced the sticks to make the paper a around ½ inch longer than the actual stick and cut a bit wide around the edges to give me some wiggle room. Remember: It is always easier to go back and trim than it is to add paper.


After I cut out some cute paper Popsicle stick wannabe’s, I gathered several popsicles (I did six for safety sake, just in case some break) and placed them in a deep baking dish full of water to let them soak for about three hours. The quicker way to make the sticks supple and pliable is to boil them for 15 minutes, but the person who did the directions I found said that this made the sticks more brittle, so I opted for the soaking method. 


Before I attempted to form the sticks into the cups after I let them soak, I gently started to bend them into a curved shape while holding the stick in the water it was soaking in. Don’t be sad if you see some slivers cracking out. If they are minor they can be sanded down once the sticks dry.


After you do the initial bending of the sticks, gently push them into cups that are about 2 ¼ to 2 ½ inches in diameter. Generally, the cup circumference (you didn’t think you would find all these geometry terms in a craft, now did you...) should be big enough to fit around your wrist, but the wood also will expand in the soaking and drying process, so try something a bit smaller than you think you will need. As you push the sticks into the cup, press the sticks to the sides of the cup to form a nice round shape.

Now for the boring part: letting them dry. If it is a beautiful sunny day where you are, put the cups o’ sticks out in the sun to dry and speed up the drying time. (This plan is foiled if you try to let them dry out in 90 percent humidity. It is just not going to work.) The person whose instructions I followed said that she let her stick bracelets dry for 24 hours, but ain’t nobody got time for that. I mean, maybe you do have time for that because it is summer. You could always try to speed up the process with your trusty hair dryer because those suckers are good for stuff like that.


Once the now bracelet shaped sticks are dry, take them out of their cups and assess the damage. Some may have cracked beyond any sanding repair in this process, in which you have to bid them adieu and move on. The sticks that survived can be sanded down to get rid of any splinters and big unevenness. This will help the paper adhere to stick thoroughly.


Now for the part that makes me as happy as a little kid playing with mud: Mod Podge time! Paint some Mod Podge onto the surface of the popsicle bangle, and carefully lay the pre-cut paper onto the stick. Press the paper down, smoothing it out so that there aren’t any air pockets. Once the paper is completely smoothed down, you can take your scissors and trim off any excess paper. The directions I found said to sand down the edges of the paper and the wood together, but this can rip up the paper if you do it while the paper is still wet from the Mod Podge. I would avoid doing this. Do a light coat of Mod Podge over the top of the paper, along the edges of the stick and on the inside of the bangle to seal the wood. The Mod Podge will make the wood kind of wet, possibly causing it to expand a bit out of its small, round shape, so make sure you are forming it back into the bangle shape if necessary. 


Once the Mod Podge dries, you have some funky, new accessories! You can get creative with what you use to decorate the bangles. You can try some fun duct tape (because we all know I have funky duct tape) to cover it or use paint or Sharpies! Experiment, and have fun!

By: Veronica DeStefano | Images: Veronica DeStefano | Instructions: Source
+