
Materials: iPod or YouTube cued to “Chelsea Dagger” by The Fratellis
Step one: Cry because you are so happy.
Step two: Smile everywhere you go because you are so happy.
Step three: Like, favorite, share and retweet anything Blackhawks related on social media.
Step four: Cry into the Stanley Cup champions shirt you already got (thanks to your brother running out to Sports Authority at 10:30 at night).
Step five: Watch that last minute or so over and over again until you can't cry anymore.
Step six: Swoon over Kane, Toews, Shaw, Crawford, Keith, Coach Q's mustache and their adorable wives and children.
Step seven: Wait for the parade because WHY ISN'T IT FRIDAY YET?
But, I know you Glossers don’t read my column to see how I fangirl over the champion hockey team. So, never fear, I did indeed do a DIY of the crafty sort.
The glorious season of summer means many things: no school (unless you are doing summer classes, in which I pray for your soul), cute swimsuits, the hot sun and the cold treats that follow. Honestly, I am not much of a Popsicle girl because I am more of a Fudgesicle girl or a Dove bar lover (read: chocolate goodness on sticks). Popsicle sticks are so quintessentially summer that I couldn’t help myself when I stumbled upon the the instructions for making bangle bracelets out of them.
Run after the ice cream truck and grab:
- Popsicle sticks (Or tongue depressors. You want the ones that are wider. They even have cool, wavy ones at some places.)
- Patterned paper (to cover the sticks with)
- Pencil and scissors (for tracing and cutting the paper)
- Mod Podge
- Sandpaper
- Cups and deep baking dish (The dish is for soaking the sticks, and the cups are for forming the bangle shape.)


After I cut out some cute paper Popsicle stick wannabe’s, I gathered several popsicles (I did six for safety sake, just in case some break) and placed them in a deep baking dish full of water to let them soak for about three hours. The quicker way to make the sticks supple and pliable is to boil them for 15 minutes, but the person who did the directions I found said that this made the sticks more brittle, so I opted for the soaking method.


Before I attempted to form the sticks into the cups after I let them soak, I gently started to bend them into a curved shape while holding the stick in the water it was soaking in. Don’t be sad if you see some slivers cracking out. If they are minor they can be sanded down once the sticks dry.

After you do the initial bending of the sticks, gently push them into cups that are about 2 ¼ to 2 ½ inches in diameter. Generally, the cup circumference (you didn’t think you would find all these geometry terms in a craft, now did you...) should be big enough to fit around your wrist, but the wood also will expand in the soaking and drying process, so try something a bit smaller than you think you will need. As you push the sticks into the cup, press the sticks to the sides of the cup to form a nice round shape.
Now for the boring part: letting them dry. If it is a beautiful sunny day where you are, put the cups o’ sticks out in the sun to dry and speed up the drying time. (This plan is foiled if you try to let them dry out in 90 percent humidity. It is just not going to work.) The person whose instructions I followed said that she let her stick bracelets dry for 24 hours, but ain’t nobody got time for that. I mean, maybe you do have time for that because it is summer. You could always try to speed up the process with your trusty hair dryer because those suckers are good for stuff like that.

Once the now bracelet shaped sticks are dry, take them out of their cups and assess the damage. Some may have cracked beyond any sanding repair in this process, in which you have to bid them adieu and move on. The sticks that survived can be sanded down to get rid of any splinters and big unevenness. This will help the paper adhere to stick thoroughly.


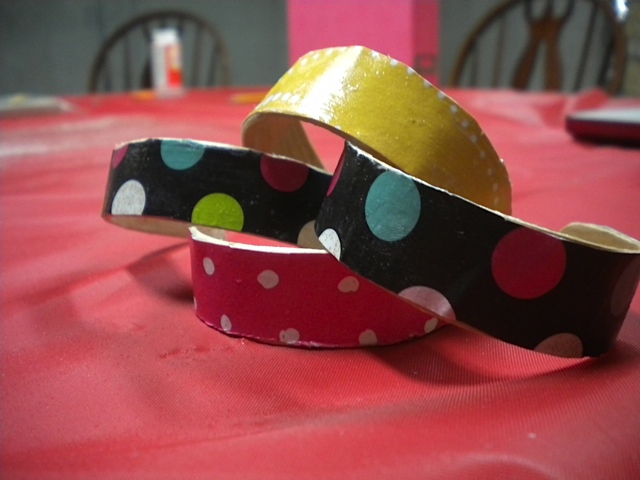
Now for the part that makes me as happy as a little kid playing with mud: Mod Podge time! Paint some Mod Podge onto the surface of the popsicle bangle, and carefully lay the pre-cut paper onto the stick. Press the paper down, smoothing it out so that there aren’t any air pockets. Once the paper is completely smoothed down, you can take your scissors and trim off any excess paper. The directions I found said to sand down the edges of the paper and the wood together, but this can rip up the paper if you do it while the paper is still wet from the Mod Podge. I would avoid doing this. Do a light coat of Mod Podge over the top of the paper, along the edges of the stick and on the inside of the bangle to seal the wood. The Mod Podge will make the wood kind of wet, possibly causing it to expand a bit out of its small, round shape, so make sure you are forming it back into the bangle shape if necessary.
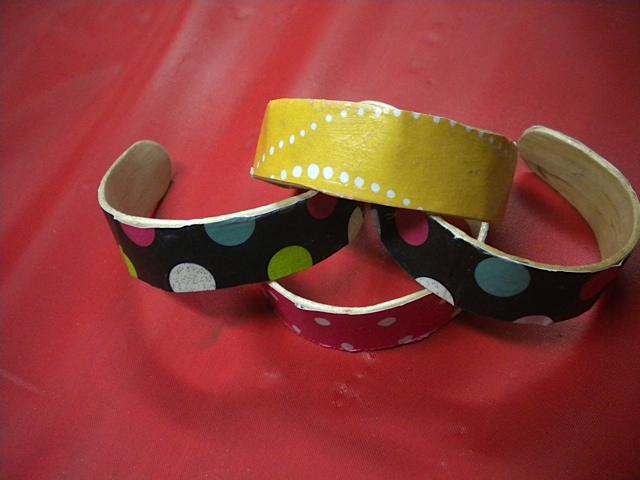
Once the Mod Podge dries, you have some funky, new accessories! You can get creative with what you use to decorate the bangles. You can try some fun duct tape (because we all know I have funky duct tape) to cover it or use paint or Sharpies! Experiment, and have fun!
By: Veronica DeStefano | Images: Veronica DeStefano | Instructions: Source


0 comments:
Post a Comment