
I hope all you Glossers are surviving the beginning of the semester. Even if you aren’t, a good craft will make you feel better. I do all the hard work for you by scrounging around Pinterest to find the crafts that are college friendly, which means using some of the millions of free T-shirts you obtain in your college career (before I finished this column I received a free T-shirt as an apartment promo). I happened to get an extra large free Mizzou Basketball shirt when we defeated Vanderbilt a couple weeks ago. A normal 5-foot-2 individual would just sigh and not even attempt to get an extra large shirt, but I knew my trusty fabric shears in my desk back at my dorm were just yearning to cut up some jersey knit. Thus, I found the braided T-shirt headband.
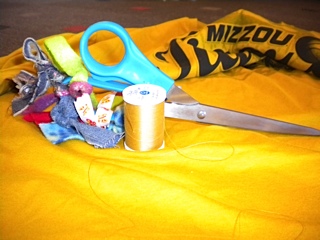
Materials to get your braid on:
- A T-shirt (If you want to show school spirit, it can be a Mizzou black or gold like mine!)
- Scissors (DO NOT RUN WITH THEM! Just because your mom isn’t here doesn’t mean you should be impaling yourself willy-nilly.)
- Needle and thread (I came to school with this stuff, because I am a notorious button fixer, but Michaels, my favorite store, has both of these and you can get thread to match.)
- Pins or safety pins
- Ruler and pencil (if you don’t like eyeballing the width of the strips)
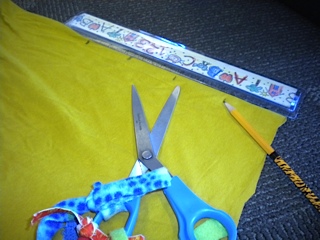
After you have picked between your blood drive T-shirt and your Mizzou basketball shirt, lay it out on the ground and use the ruler and pencil to measure out four 2.5-inch strips. Cut these out, and you should have four little T-shirt tubes. Cut them open so that they are long strips.
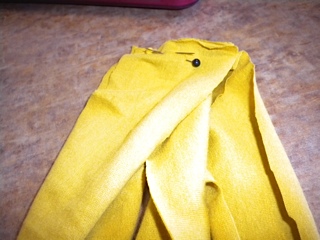
Once you have all four strips, use a couple sewing pins or a safety pin to hold all the strips together at the top. Use a book, like that Econ book that you would never touch otherwise, or a heavy soup can to hold down where you’ve pinned to make it easier to braid. It’s just like how you may pin or tape down the top of a friendship bracelet. If you have never made a friendship bracelet, I am sorry. I am sure you have plenty of friends.

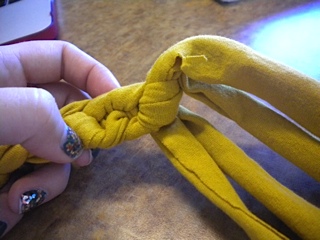
Now to begin the braiding! Since it’s four strips, this is a tad different from your average elementary school braid. First, make sure you have the four strips fanned out so that they aren’t twisted or hidden. Then, take the strip farthest to the left and cross it over the strip next to it. Take the second strip from the right and cross it over the farthest to the right strip. Right now you just have a little twist or “X” like things. Take the strip that was originally the farthest to the right strip, now the third strip from the left, and cross it over the strip to its left. Continue in this same pattern until it begins to be something that is almost too fun to stop.


If you are having issues with the whole braiding thing, think about numbering the strips from left to right as one through four. Strip one goes over strip two, and strip three goes over strip four. Then, strip four goes over strip one. You continue with strip two over four and strip one over three, so on and so forth. Refer to my pictures or the instructions that I found, if you have something against my photography.
Force yourself to stop the addictive braiding when it’s long enough to go around your head, and knot the end. The simple knot you learned with weird bunny and hole references to tie your shoe works just fine.

Now it’s time for your needle and thread to make their big entrance. Make sure you have pins on both ends of the braid. After threading the needle, which is the hardest part for most people (not me, I am a pro), sew a simple running stitch at the ends of your braid. For those that are unaware, a running stitch is where you go down through the fabric and up through it again.

After you have relived your childhood love of lacing boards with that simple stitch (please don’t tell me I am the only one who had those...), trim the excess T-shirt so that there is just a bit of fabric beyond your seam. I then sewed a whip stitch to firmly hold all the pieces together. The internet can help you with that one. The instructions that I used from Pinterest said they used a machine to sew the ends, so if you just happen to have one of those lying around, hit that up because it will go much faster. I personally find hand sewing soothing, but then again I write a DIY column, so I am a bit biased.


After you have finished sewing the ends, wrap the braid around your head and hold the part where the ends overlap. Pin these and do a running stitch where each end overlaps. Since we are all about making things look pretty, use a bit of scrap T-shirt to make a little cover over where the ends overlap. Wrap the piece of T-shirt around the area where the ends connect and pin the ends of the piece together. Sew a running stitch, trim the excess, and then sew a whip stitch if you have little faith in your running stitch like I did. If you want to be even fancier, you can flip the little tube you just created inside out so you don’t have the puffiness of the seam.

Bam! You have created a nice, stretchy headband! If you made this in the public area of your lounge, I am sure your floormates will be begging you to make some for them, and it will probably go much quicker because you will be a braiding pro. This headband is great for all those days where your hair is staging a coup on your head. Plus, it will get you major compliments. If you are feeling up to the challenge, there are patterns for five or six strips.
Don’t forget to craft this semester along with all that school work stuff! As always, happy crafting, and go Tigers! MIZ!
This T-shirt headband tutorial is part of Veronica DeStefano's weekly DIY column, inspired by projects found on Pinterest.com.
By: Veronica DeStefano| Pin: Source | Instructions: Source | Images: Veronica DeStefano


0 comments:
Post a Comment