Stuff in this world can be complicated. World issues, manhunts, math problems, your relationship with Missouri weather and even your friendships can be complicated. Sometimes you feel like all these complications are just a ball-and-chain dragging you down. But, you know what isn’t complicated (usually...)? Crafting! Crafting doesn’t judge you or make you feel down! Plus, this week’s DIY is so simple, you are pretty much doing the same thing the entire time you are crafting because that is how easygoing wrap bracelets are.
Ransack your friend’s room after they have made a Michael’s and Hobby Lobby trip for:
- A silver ball chain
- Silver ball clasps
- Embroidery floss or thin yarn
- Tape
- Scissors
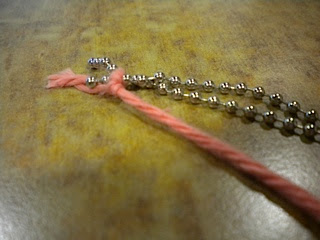
Tie the two chains together with the embroidery floss or yarn that you are using. The full bodied lovin’ you will get from the yarn may make it hard to wrap. Since it is thick, you have to pull it tight. If that seems like too much for you to handle, stick to the thin embroidery floss to make it a bit easier on yourself. Tape your chains down at the knot to a table or another hard surface (a desk, your bedpost, an unsuspecting person’s back...).
Now it is time to get your wrap game on. Take your yarn, and wrap it over the first chain and then through the middle of the two chains. Then, go behind the second chain with the yarn and wrap it around the top and through the middle, continuing to wrap it behind and around the first chain. It will kind of be like braiding. The yarn will wrap around the straight parts in between the little silver balls in the chain.
My tape kept slipping as I was wrapping, so at some points I found it easier to just hold it and wrap it, but I am probably alone in this. Continue to wrap in this same fashion until it almost becomes soothing and you are just wrapping and rapping to "Suit & Tie."
Once you finish wrapping down the length of the chain that is needed to fit around your wrist, wrap the yarn tightly a couple times around the bottom and then tie it off. Attach a little clasp to one of the ends of the chain. I swear, it is like one of those tricky, metal puzzles trying to put that little ball in the clasp sometimes. You can also use some clear nail polish to seal the knots at the ends of your bracelet.
Whoopee! You now have a pretty wrap bracelet of your own! No need for that silly friendship business. This is also a great DIY if you want to make an anklet for the warm weather that will hopefully be consistent here soon. Or, you can rock that early 2000s swag and make a choker. As always, happy crafting, and go Tigers! MIZ-DIY!


0 comments:
Post a Comment