


Your heart desires the following things for this DIY:
- Jewelry wire (the instructions I pinned said 20 gauge, but feel free to experiment with 12 and 16 gauge).
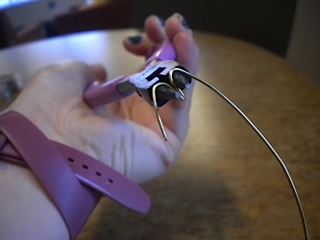
- Round needle nose pliers (I got some that have a wire cutter in it as well. I swear, people at Michaels know me by name with the frequency that I visit that store).

After you say "bye" to your favorite Michaels cashier and head back to your residence, pull out your wire and pliers. Unwind a good amount of the wire so you have enough to work with. I recommend practicing bending curves into the wire just so it doesn’t end up as a mangled mess. This holiday and ring are all about love, for goodness sake!
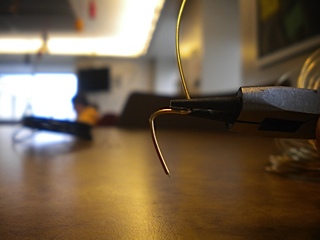

Once you feel ready for the real deal, take a little less than an inch of the wire and bend it with the pliers to form the first bump of the heart. Go down the wire about half an inch more and create the middle of the heart, or the dip down, by holding the wire with the pliers and bending the wire up so that you now have the first hill of the heart. Don’t be worried if it looks like a kindergartener’s attempt at writing a capital "N."

Now, form the other half of the heart by bending the wire around the pliers in a fashion similar to how you made the first half. Use your pliers to squeeze the tip of the valley in the center of the heart to make it sharper. Then bend the cut end to the rest of the wire to create the heart shape. You may need to wrap the little end around the main wire if it’s a little long.


Now, figure out what finger you want to bestow this ring on and roughly measure around it with the wire. Cut the wire a little bit longer than what you need to go around your favorite phalange (look at me helping you study for your anatomy quiz. I am so helpful. And modest...). Make a little loop in the cut end by bending it with the pliers. Using the pictures will probably really help for this DIY, so follow those to help you, and look at the instructions I pinned for more help if you need it!
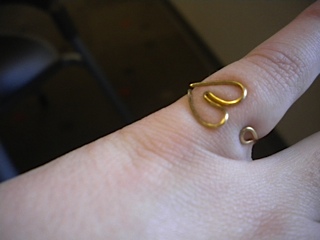
Bless my heart, you have created a lovely heart ring! So don’t wear your heart on your sleeve, wear it on your finger! These are perfect little Valentine’s Day trinkets to give to the loves in your life, such as your besties, your mom, or your roommate! I hope all you Glossers have a love-filled Valentine’s Day, no matter your relationship status (in honor of Beyonce, "all the single ladies!"). As always, happy crafting, and go Tigers! Hearts to all of you!
This wire ring tutorial is part of Veronica DeStefano's weekly DIY column, inspired by projects found on Pinterest.com.
By: Veronica DeStefano | Pin: Source | Instructions: Source | Images: Veronica DeStefano


0 comments:
Post a Comment