

Will the real cool shady DIY please stand up?
I hear that summer usually means that there is a lot of sun. One would think otherwise with all the storms the Midwest has been having. But, as the adorable little orphan Annie said, “The sun will come out tomorrow!” (Or the next day... or next week... eventually it will come out.) When the sun does come out, your prized peepers will take refuge behind some sunglasses. Nothing dampers a sunny day like some boring sunglasses. Never fear, the DIY Queen is here to help you spice up your favorite sunnies!
Your sunglasses spices:
- A pair of sunglasses (ones with thicker frames are preferable)
- Studs, gems or pearls to bedazzle the sunglasses (I used leftover pearls from my pearl Peter Pan collar DIY)
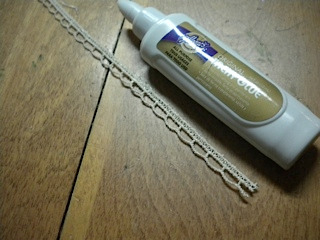
- Lace ribbon scraps (these are optional and just spice up your sunglasses even more)
- ALL OF THE GLUE (I used my trusty hot glue gun because I am obsessed with it, and I used some Tacky glue for the lace. But any type of jewel glue or something like that will work for the pearls.)
Now that your craft Avengers have assembled, start by having some sort of idea of where you want to put your pearls or gems. I decided to do the top half of the sunglasses, but you could also go all the way around to get the full Chanel-inspired effect. This DIY is all about what you want to do and your embellishing limits. Some people are hardcore bedazzlers and others are more into the simpler bedazzles of life, yet we can all walk the earth in crafting harmony.
Once you have your game plan down, you can start gluing. I started at the corners of my sunglasses because that was before I knew how much of the frame I wanted to cover (just a couple gems on the corners is a safe entry to this trend). I recommend when you glue your pearls or gems that you glue one on one side and then mirror where you glued it on the other side. This will keep it symmetrical, and if you are worried about how many pearls or gems you have, this will make sure you will have the same amount on both sides.
When you glue, you will want the face of the glasses to be flat. I had the sunglasses folded up and would use my other hand to steady them while I held the glue gun. Sometimes I would have the sunglasses unfolded with the face resting on my open palm and the glue gun in my other hand. Whatever you are most comfortable doing is good, or whatever you can do the best without getting yourself burned by hot glue or your fingers stuck together.
Once you are happy with the amount and pattern of you pearls, it is time to spice it up even more, if you dare! I had some lace scraps with a distinct flower half and a scalloped edge. I cut the lace ribbon down the middle, vertically, to separate these two sides.

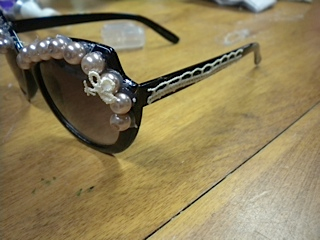
The temples (that is the official name for the long, stem-like things that go on the side of your face to actually keep glasses on your face) were looking pretty lame compared to the bedazzled frame. So, I used the scalloped edge of the lace ribbon and cut it so that it fit the straight part of the temples. I glued it down with some Tacky glue, repeating on the other side of sunglasses.
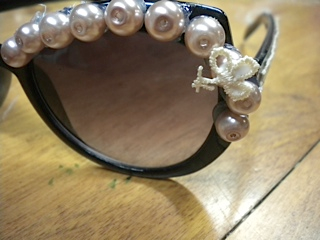
I still had that flowery part of the lace ribbon leftover. I decided to cut out two little individual flowers and use Tacky glue to adhere them to a pearl on each upper corner of my frames. You have to love that flower power (that is my inner hippie coming out).
Yay! Now you have some spectacular, specialized sunglasses to sport all summer long! (Yes, the amount of alliteration in that previous sentence was completely necessary.) If you are looking for more tips, check out the link below for the instructions that inspired my DIY. It is number 31 on the list. Now, go outside and enjoy the sun!
This tutorial is part of Veronica DeStefano's weekly DIY column, inspired by projects found online.
By: Veronica DeStefano | Images: Veronica DeStefano | Instructions: Source


0 comments:
Post a Comment